How to get started

The installation should only take 15 minutes or less.

1. Download the app

  • Download the Minut app from the Google Play Store or iOS App Store.
  • Open the app and create your account. If you already have an account, just open the Minut app and log in.
  • Create your first unit following the steps in the app. Then install a Minut M3/M2 Noise & Occupancy Sensor.
  • In the same unit, scroll down to the Devices section and tap on the “+” sign to start the installation process.

You won’t be able to install the Minut L1 Water Leak Sensor in a unit without a Minut M2 or M3 device, so make sure to install an M3/M3 first.

Start app

2. Install sensor

Not sure where to install your sensor? Scroll down for tips.

  • Scan the QR code on the sensor.
  • Press the button on the back of the sensor until you hear a beep.
  • Peel off the sticker and attach it to the sensor, making sure you don’t cover the button. Then stick the sensor to the wall or cabinet.
  • Make sure the metal probes touch the surface that you want to monitor for leaks. It’s recommended to secure the lower part of the sensor to the wall/cabinet with a screw.
Diagram showing a connection between a square smart home hub and a rectangular device with a button, linked by a dotted line.

3. Finish configuration in the app and test

  • Finish configuration in the app.
  • To test the sensor, you can fill a glass with water and place the metal probes in the glass. Wait for around 2 minutes, and you should be alerted to the leak. Once you receive the alert, take the probes out of the water and dry them.
  • If the test doesn’t work immediately, wait for 15 minutes and try again. The connection between your L1 Water Leak Sensor and M2/M3 sensor can take up to 15 minutes.

The alert in the app will resolve itself once the sensor stops sensing water.

Line drawing of a vertical speaker with a circular center, connected by a cable to a rectangular device with a button at the bottom.

Where should I install my sensor?

We recommend installing Minut L1 in the area where leaks are likely, such as the basement or under sinks. Make sure that the metal probes touch the surface that you want to monitor.

A Minut sensor installed underneath a pergula sitting outside

Selecting location

Never install Minut L1 outdoors.
Minut M2 or M3 sensor illustration
Install within 32 ft (10 m) from the Minut M2 or M3 sensor.
Two rain drops
The metal probes need to come in contact with water to detect a leak, so make sure they touch the surface where a leak might occur.

Frequently Asked Questions

How do I add a new device to an existing home?

In the mobile app, go to the Homes tab and pick the home you want to add your device to. Scroll down to the “Devices” section and press the + sign to add a new device.

How do I turn the sensor on? Where is the power button?

There’s a button on the back of the sensor. You need to press it until you hear a beep.

Can I use the Minut L1 Water Leak Sensor on its own?

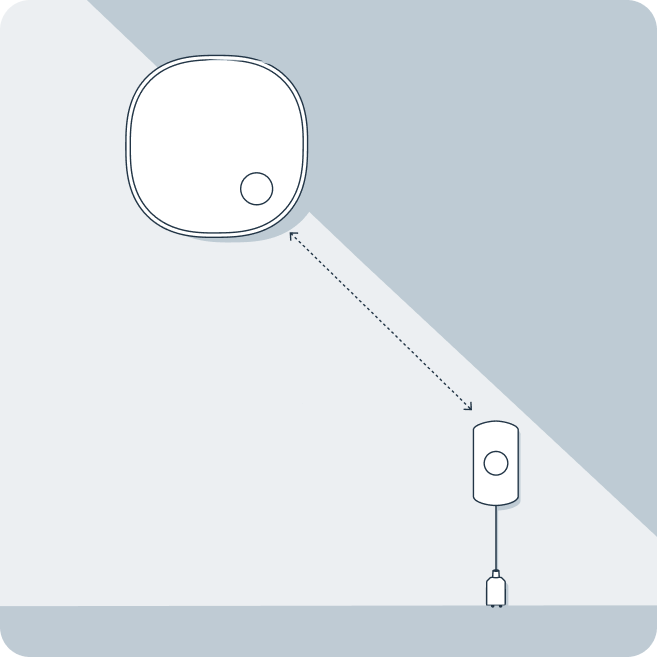
No, Minut L1 Water Leak Sensor needs to installed within 32 ft (10 m) from the Minut M2/M3 Noise & Occupancy Sensor to work.

How can I upgrade my plan?

You can manage your plan in the My Account section of our web app. Navigate to the Plan, Billing & Payments tab, then scroll down and click on Change Plan.

How can I update the wireless network my device is connected to?

Minut L1 connects to the network via Minut M2 or M3.

You can update your network settings for the M2 and M3 sensors in the mobile app:

  1. Open the Minut app, and navigate to the Properties tab.
  2. Select the unit that you want to update the network settings for.
  3. Scroll down to the “Devices” section.
  4. Tap the Minut device you want to update network settings for.
  5. Navigate to Advanced settings and follow the instructions in the app.